Have you ever tried to make your own embossing plates? Today I'm going to show you how you can create with your Cricut to make your own reusable embossing plates. It's My Cricut Craft room day and the conversation is about Every Day creations using your Cricut.
Instead of a full project, I'm sharing a how-to tip for embossing. If you are a card maker, you probably already own an embossing machine and a ton of embossing folders. There are already a ton of great design choices available from a variety of brands. However, did you know you can easily make your own embossing designs with your cutting machine?
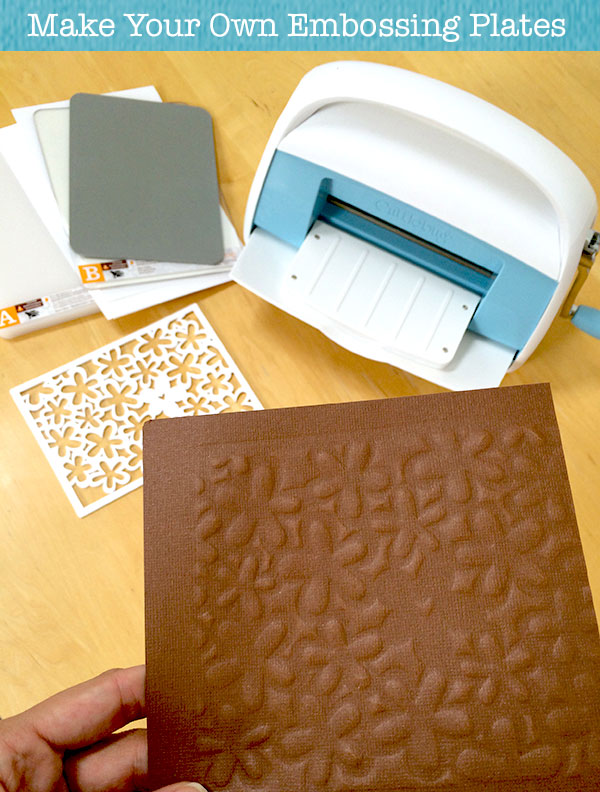
It's really simple and doesn't take much time at all! Remember that black and white flower designed card I made last week? I'm going to use that same design to show you how to make your own embossing plates today. So if you want to make this same embossing plate I am, just head over to the Cricut Design Space and use the Flower Lace card Make-it-Now project I designed. I bet you'll make custom designs for your cards and mixed media art in no time!
Make Your Own Embossing Plates
Materials:
- A cutting design of your choice (or use the Flower Lace Make-it-Now project )
- Cardstock
- Cricut Cutting machine
- Glue
- Embossing machine – I use the Cuttlebug
I'm using: Cricut Explore cutting machine and a Cuttlebug for embossing
How to make your own embossing plates:
- Cut out 4-6 copies of your design from cardstock.
- Glue the layers together. You don't need to coat the layers with glue, just enough to hold them together in a stack. For my design I added glue right in the center and then on each of the 4 corners, that's it.
- Allow to dry.
You're finished!
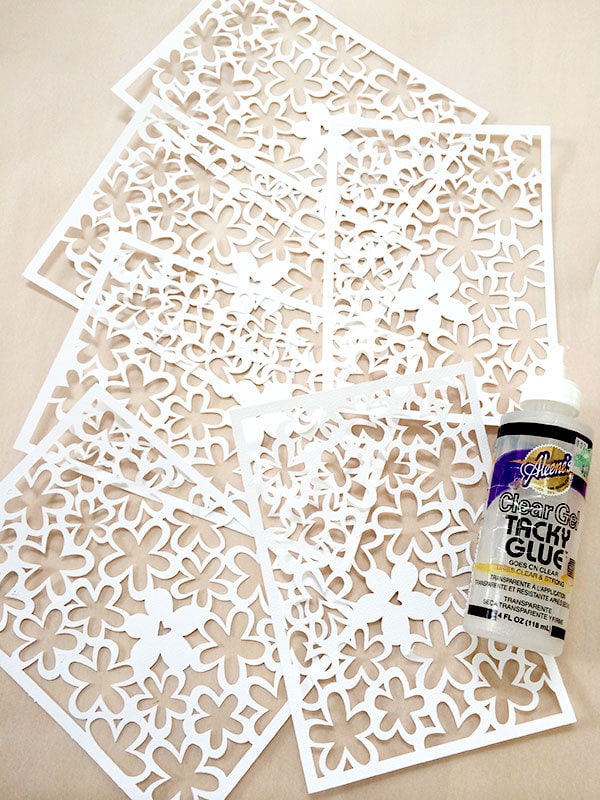
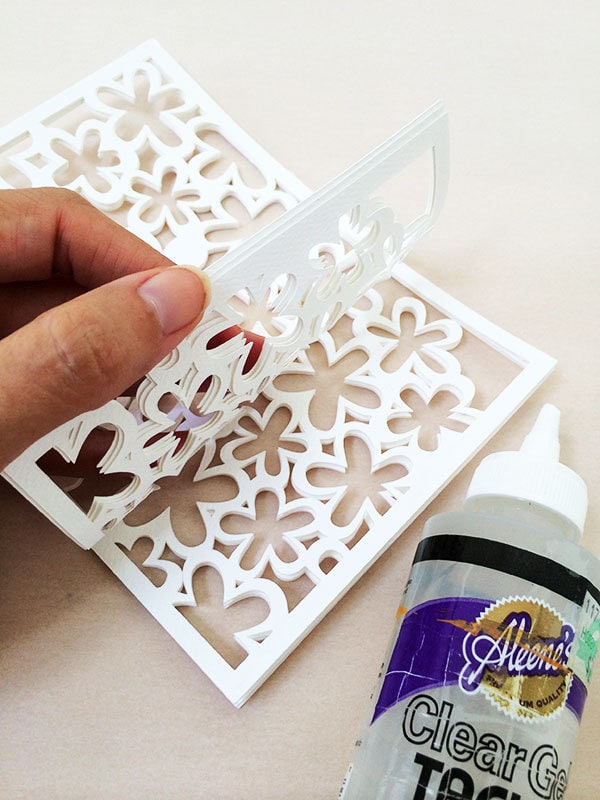
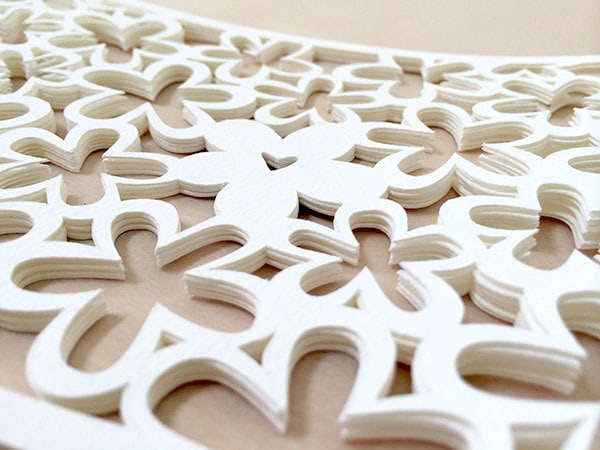
Now layer your custom cut embossing plate with the rest of your embossing plates as normal. If you find that their is not enough pressure to get a good emboss from your design, add a few layers of cardstock on top of the rubber embossing mat.
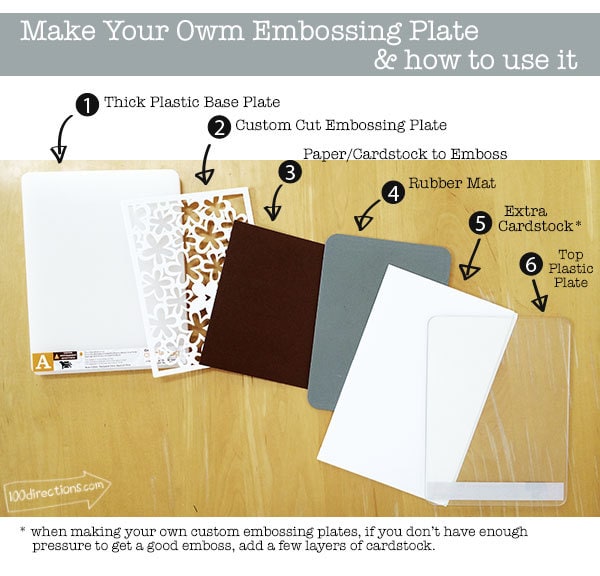
Note: you and also use chipboard, but for some cutting machine that would require a deep cut blade. So I am using cardstock. Adjust your number of layers for the material you are using.
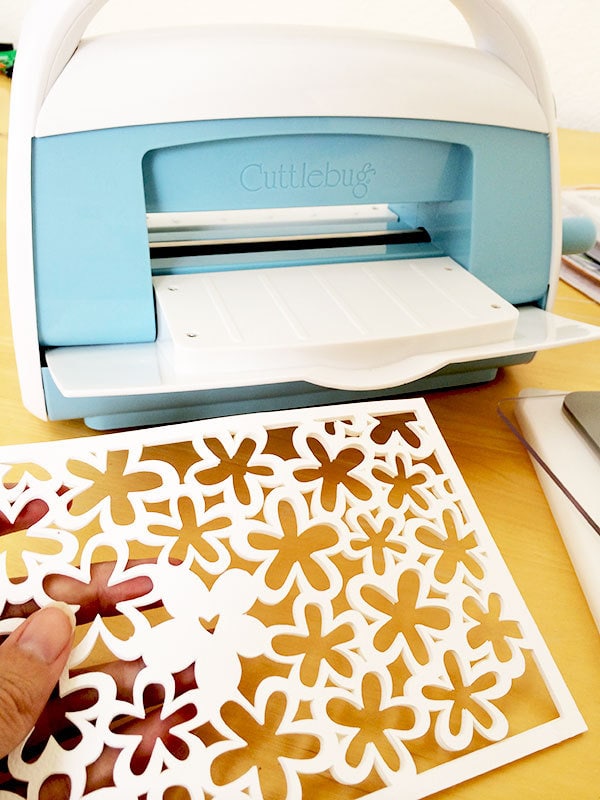
You can use all kinds of patterns and designs to create your own custom embossing plate. You are only limited by your imagination! Try making word art or a design for a special occasion. Play with a whole bunch of different ideas and see what you like best. I'd love to hear what you create, come back by and tell me about it!


I can’t wait to try this. I just started embossing and this would be so cool to do. I only have a Spellbinders Prizm machine right now but if I like it, I might get a different one to use. Thanks for the tips.
I’ve never tried the Prizm machine, I’d love to hear what you think about it.
Well it’s a little one and only does 3″ width paper but I still like it. I want to start making my own Christmas cards and think this won’t do what I’d like. I have a Cricut Air Explore and absolutely love it. I’m going to start using the two together to see what I can do.
I am trying ro make a custom folder for a project with a leather type material. Works well with the folders you buy not not as well with cardstock. It seems like it isnt sturdy enough. Any suggestions??
I’m not sure I understand the question. Are you trying to emboss a leather type material folder? If so… the cardstock embossing plates might just not be strong enough to leave a good impression in the leather.
Hi there! I intend to do this, soon. It will be added to a board I keep in my craft room of Projects I want to do soon. I am already designing my first embossing folder in my head. TYVM! 🙂
This is awesome. I use a sizzix machine and it does not have a rubber layer or hard plates. Any suggestions on how I can make this work? Thanks in advance.