I'm going to assume you are familiar with the name Cricut® (cricket), but just in case you are not, it's a machine that can cut materials into a variety of shapes. Have you ever wanted to find some paper cut outs for party decorations or a gift you were making but couldn't find the shapes you were looking for? Names are usually the toughest in my family because we didn't spell our kids names like everyone else. So either I hand write names on things or I just leave the names out.
I got my hands on a Cricut Mini® and finally had the opportunity to try it out. It's fantastic… easy to use, doesn't take up much space and works like a charm. If you've never used a cutting machine, there is a tiny learning curve, but the Cricut starter kit comes with clear, step-by-step instructions to get you going. I was up and running, making my own designs in less than an hour!
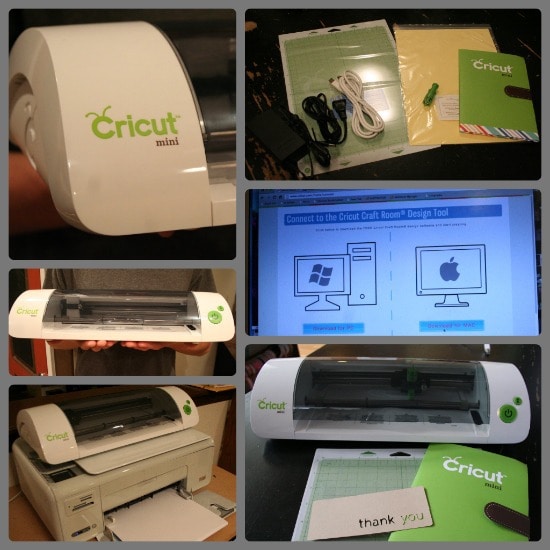
Great features of the Cricut Mini:
- Size – I had it sitting right on top of my printer while I was using it and it fit perfectly. So if you're short on space, this machine is perfect!
- Price – Regular retail price is only $129 and the package comes with everything you need to get started: the machine, the startup guide, a sample pack of paper/cardstock and a cutting mat.
- PC and Mac compatible – I'm an Apple girl all the way! The software works great on both machines.
- Instructions and help – The package includes instructions to get started. You also get access to a ton of online help including a whole Cricut community you can join to talk about any issues or ideas you have.
- Design library – there is an enormous design library you can access filled with a wide variety of images, text art and fonts. There is a fee associated with most of the library, but there is a selection of free cutting designs you can use.
- Design software – The Cricut Craft Room design software enables you to create your own cutting designs using the images in the design library. Mix and match fonts, images, borders, you name it!
As a designer, I wanted to see how the design software worked to combine images. It's one thing to be able to cut out pre-set images, but what about making your own art using the Cricut software. I only touched the surface when it comes to how far this software can go. I played a bit with layering, resizing and combining design elements. There's even an option in the design software to “draw” your own images… it's not crazy complicated, but it also isn't going to be as fancy as using something like Adobe Illustrator. (Thank goodness, that would be overwhelming for non-designers, I think).
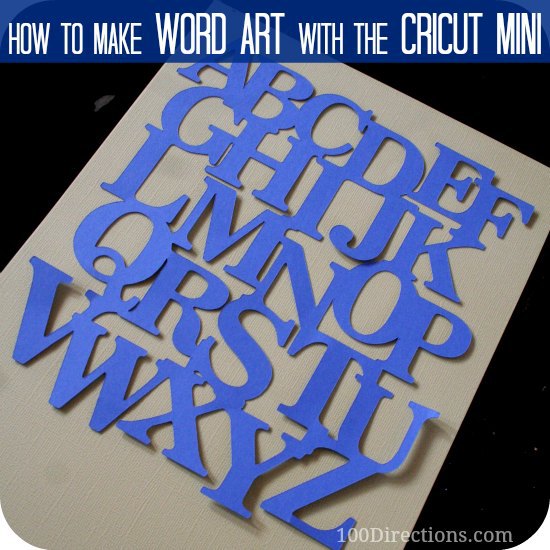
The Cricut mini design software allows you to use images together and merge them into a single image. You can create layers and even join letters to create some really neat word art. I wanted to see how far I could push this software. I was able to merge all 26 letters in the alphabet and when the design was finished and the machine started cutting, it worked perfectly! Just keep in mind, the more images you layer on top of each other, the slower the software is going to run… that's typical with any system… even a work horse is going to move slower when you load up that cart.
To make your own word art follow these simple steps:
- Open the Cricut Craft Room Software and log into your account.
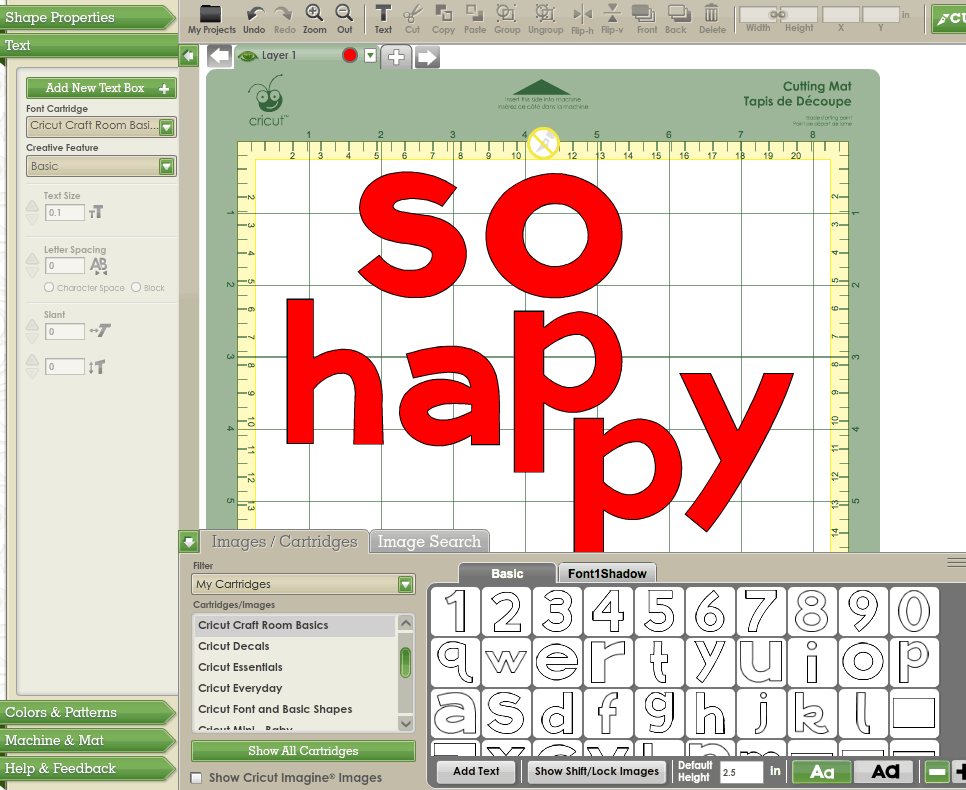
- Select “Text” from the left hand menu and then select the font you'd like to use by choosing a collection/cartridge from the list.
- Type the letters you want to use making sure to stay within the cutting area.
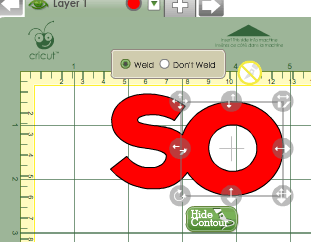
- Individually select each letter and move it to the location you'd like, overlapping other letters so when they are cut, they create a single cut piece. To make sure all your letters cut together in a single shape, make sure you select “weld” each time you overlap two shapes.
- Then, once you have all your letters the way you'd like them, you're ready to cut!
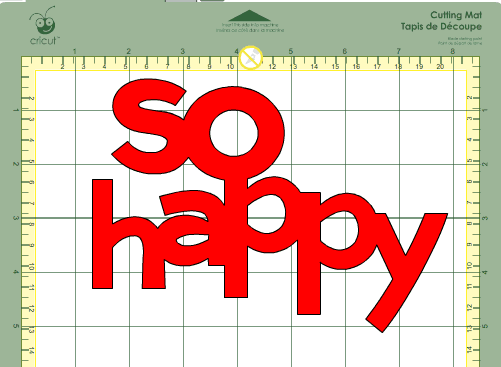
See how all the letters seem to be merged together? That's how your text should look when you've properly “welded” it together. The black line is the path the Cricut Mini® will follow when cutting out the letters. (No, the machine does not color the text, so you won't end up with red letters… the letters will be the color of whatever paper you choose to use.)
Tip: It might be easier to type one letter at a time and place where you want it and “weld” as you go, rather than typing the whole phrase and then going back to place and weld. I found with larger words and phrases (such as all 26 letters in the alphabet), moving letters as I typed them went faster and was easier for the software to process.
Once you've finished your word art, you can save the design file to your “My Projects” folder within the Cricut Craft Room software so you can use it again and again.
Happy Crafting!
Disclaimer: I was sent a Cricut Mini to review, the opinions shares are 100% my own.



How do I get upper case letters from the cartridges on my mini? I haven’t been able to find anything on the internet. I’ vet had my mini for awhile but just started using it recently. Thanks for any help you can provide.
Hi Norma, I’m sorry, I’m not as familiar with the mini or the software it uses. What happens if you type letters the way you want them and try to use the capital/upper case letters?
I actually got it figured out. I started clicking this and that to see what it would do…and I got it. Thanks for replying
Hello I’m a new user of the cricut mini. When I go to cut it tells me all my images are not on the grid and will not print. Even when its one letter. I need help.
Check your sizing. The print size isn’t a full page. Let me know how that goes. Are you using the Cricut Explore, or the actual “mini”?