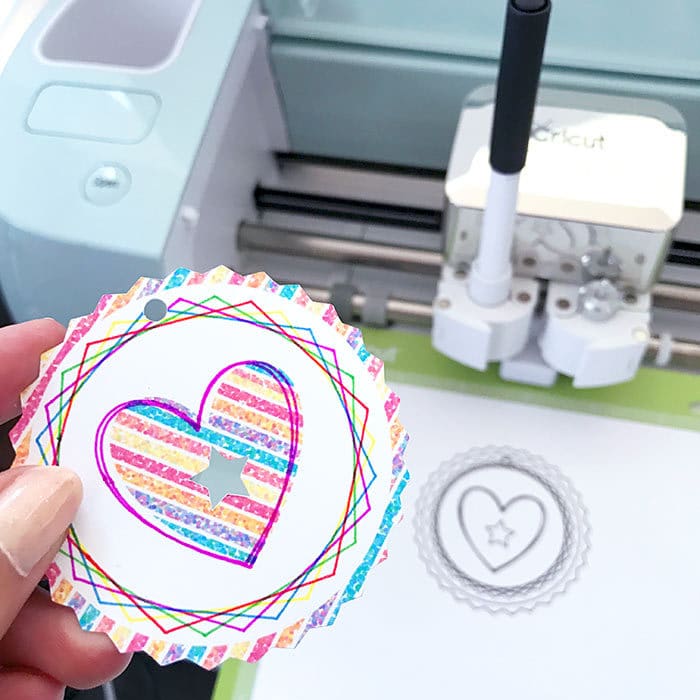
Do you ever use the basic shapes in Cricut Design Space? Today I'm going to show you how to Draw Designs with Cricut and Basic Shapes. There are a ton of great designs to choose from in Cricut Design Space, however sometimes you just need a simple cut shape. Or you might want to add your own customization to a design with a bit of drawing accent. The basic shapes can be a great, free, add-on to your fun Cricut Projects.
Draw Designs with Cricut and Basic Shapes
Whether you are just getting started using your Cricut machine, or want to practice some techniques, this tutorial will help you explore a few different features of Cricut Design Space and using your pens to draw and write. Basic shapes are available for free in Cricut Design Space and can be used to create quick cut designs, accents to current designs and extra draw accents on your projects.
For this tutorial you need the following materials:
- Cricut Explore – any version will work
- Cricut Design Space – this tutorial is specifically using DS version 3
- Cricut pens – your choice
- Paper – use practice paper to test out the techniques
Today we're going to talk about:
- Including Basic Shapes available in Cricut Design Space
- Creating Drawing Designs Basic Shapes
- Welding Basic Shapes to Create More Complex Shapes
- Creating Print then Cut Pattern Fill Designs
- Adding Drawing to Print then Cut Designs
We've already covered the basics of drawing and writing with your Cricut as well as using fonts to write or draw with your Cricut. Today we're going to cover adding your own basic shape designs, using these shapes to draw with your Cricut pens as well as adding drawing to designs you create with your basic shapes. These tips should set you up for customizing all kinds of designs using drawing and printed pattern fills.
First, let's look at the available shapes.
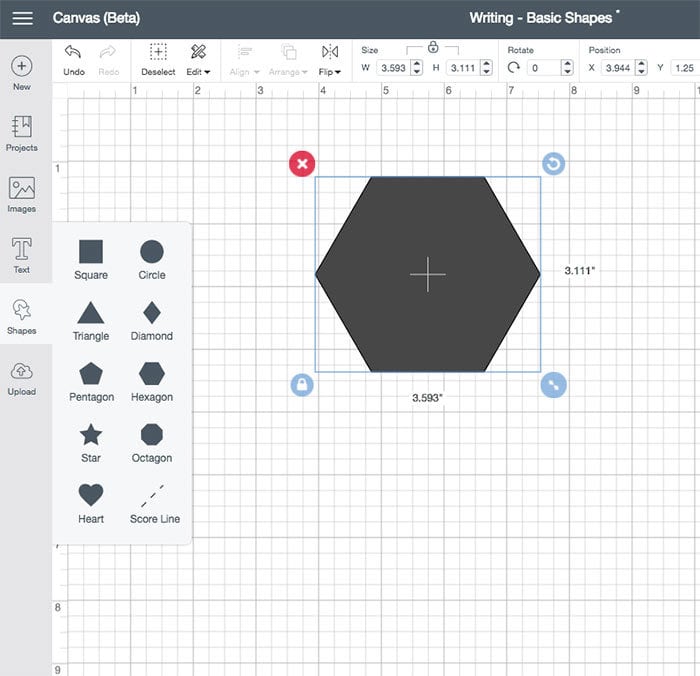
There are 9 available shapes and a score line. You can use each shape on it's own individually, or combine them to make other shapes. You can add the scoreline to designs as needed as well. Simple select the shape you'd like to use, resize it however you need and then apply the desired action (cutting, drawing or printing.)
Creating Drawing Designs Basic Shapes
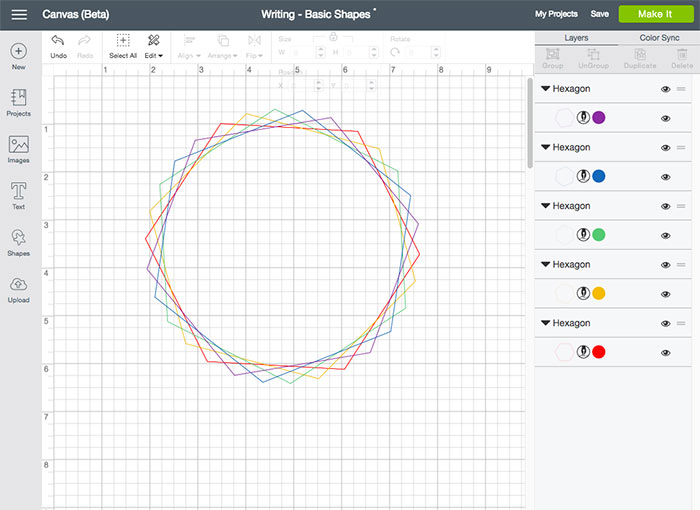
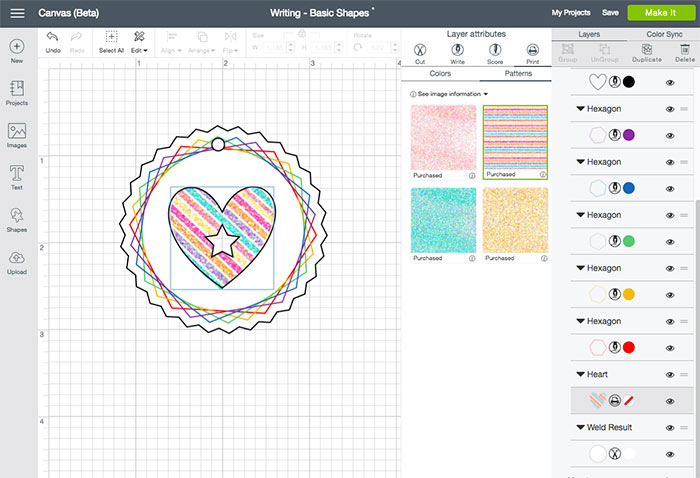
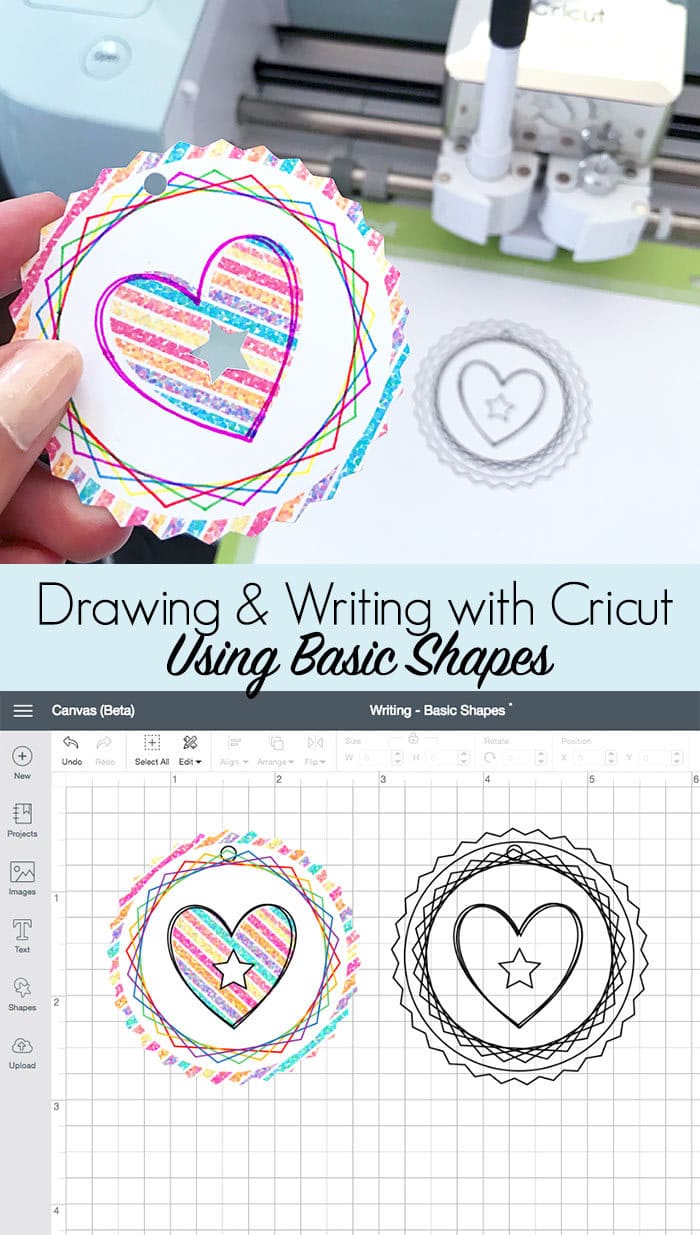
To make more complex shapes and designs, you can use multiple basic shapes. Layer them to draw different colors or weld them together to create a whole new shape. I like to create fancier borders to some of the single designs to create kind of an accent or even to use as stickers. In this example I've used the hexagon, layered 5 times, rotating a bit with each layer to create a fun decorative drawn design.
Welding Basic Shapes to Create More Complex Shapes
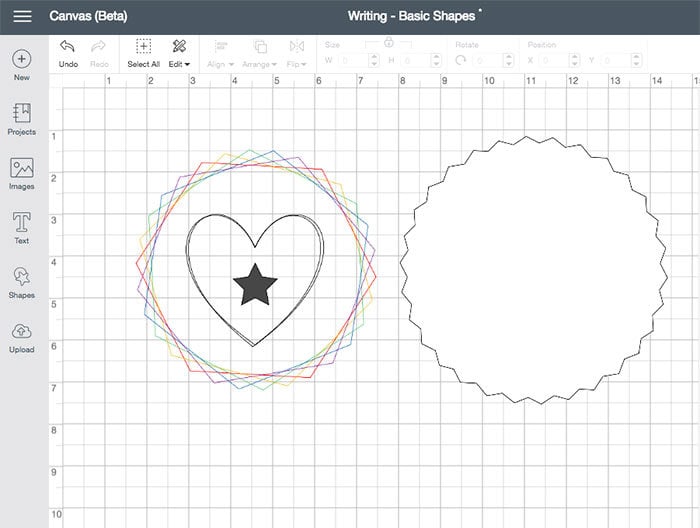
If you take this same hexagon layered design, select all the layers and weld them together, you'll end up with a decorate border style design that can also be drawn, cut or filled with a pattern to print then cut.
I added a heart and layered a second heart, rotating it slightly and then I added a star to this design as well. All of these shapes are available as part of the standard Cricut Design Space options. The design on the left is all set to draw except for the star. The design on the right is set to cut.
Creating Print then Cut Pattern Fill Designs
You can also fill basic shape designs with patterns and then they can be print then cut. Add some drawing accents to these printed designs for a little extra flare. Select the shape you want to fill with a pattern and then set the shape to “print”. Choose your pattern and your Cricut will automatically know to cut out that shape. In this example I've filled 1 of the 2 hearts with a pattern. As is, the drawing line will not print on this heart, instead you need to attach the drawing line to the layer you want it to draw with.
Adding Drawing to Print then Cut Designs
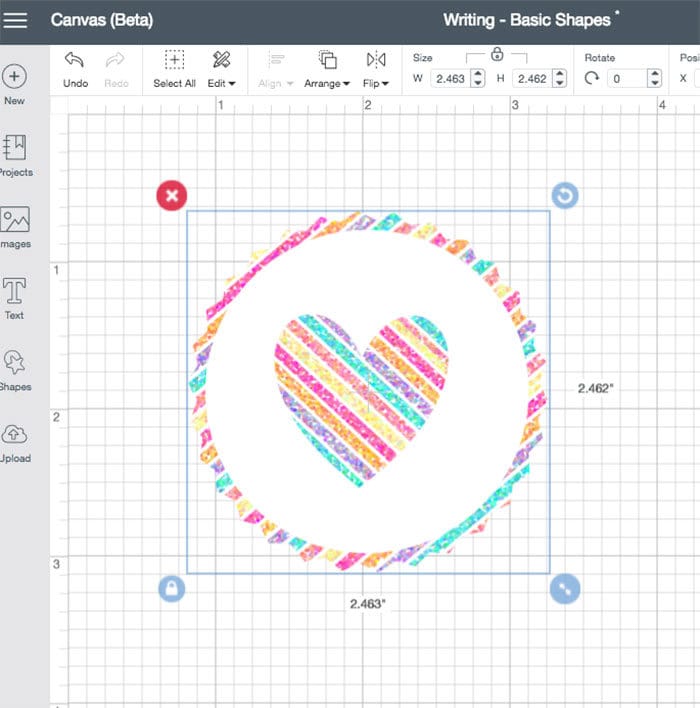
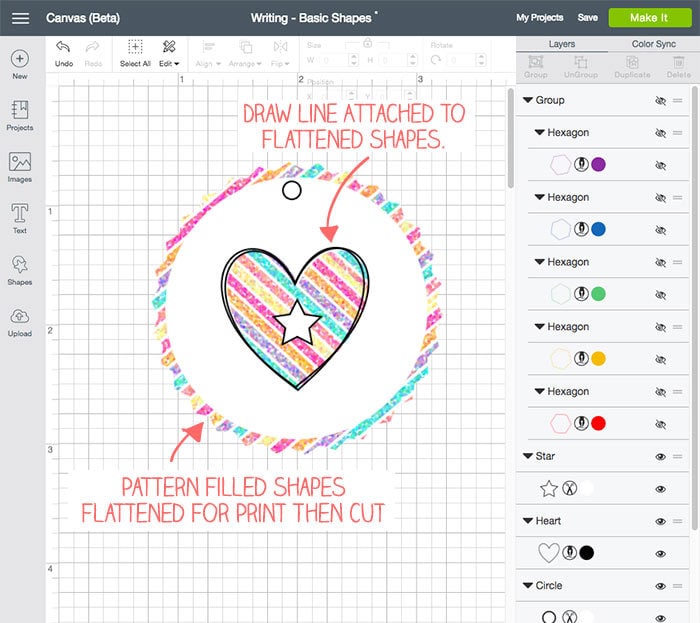
Once you've set up your printed design, you need to attach your drawing to the layer. in this example, I've flattened the entire printed design so the heart and hexagon design border all print and cut as a single design, cut out at the far edge of the border. So this is now a single layer printed design. All of my draw lines can now be attached to this single printed layer.
Add the drawing layers as you'd like to your printed design. You can add drawing lines in different colors or use a single color. Just make sure all drawing lines are attached to the shapes you want them to print on.
This entire design has now been created just using the free basic shapes within Cricut Design Space. Draw or print or combine the two, it's up to you. Basic shapes offer a variety of options to customize your projects. You can take a simple icon and make it fabulous just by adding a few draw lines and a fun pattern!
I have a canvas design for you to play with. Head over to Cricut Design Space and play with the canvas design I've used for this project. You can unflatten the layers, change the pen colors or customize the design however you'd like!
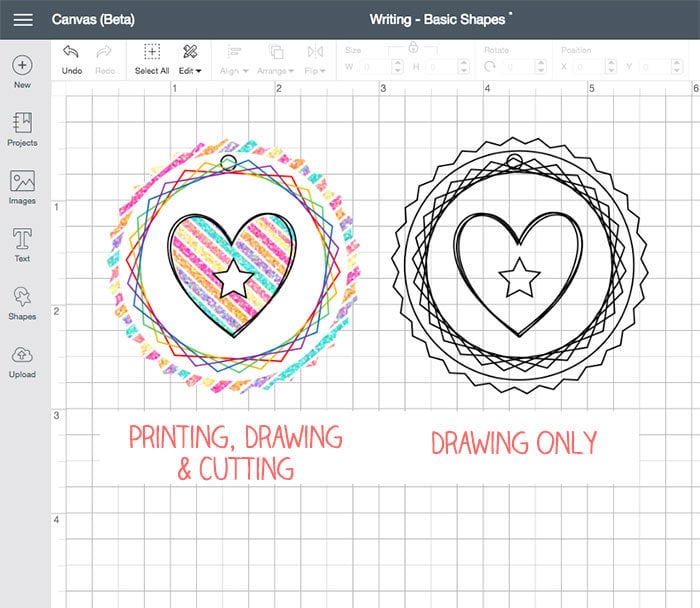
Use this canvas layout to make this project – click here
Play with the tools, see what design combinations you can create. use your favorite cut designs with some basic shapes to personalize the look even more. As always, I'd love to see what you create with your Cricut machine!
—– Shop for Cricut Pens —–


I love the drawn line designs. Reminds me of a Spirograph! Thanks for sharing!
Thank you… I completely agree. I love to watch the Cricut draw all the different lines.