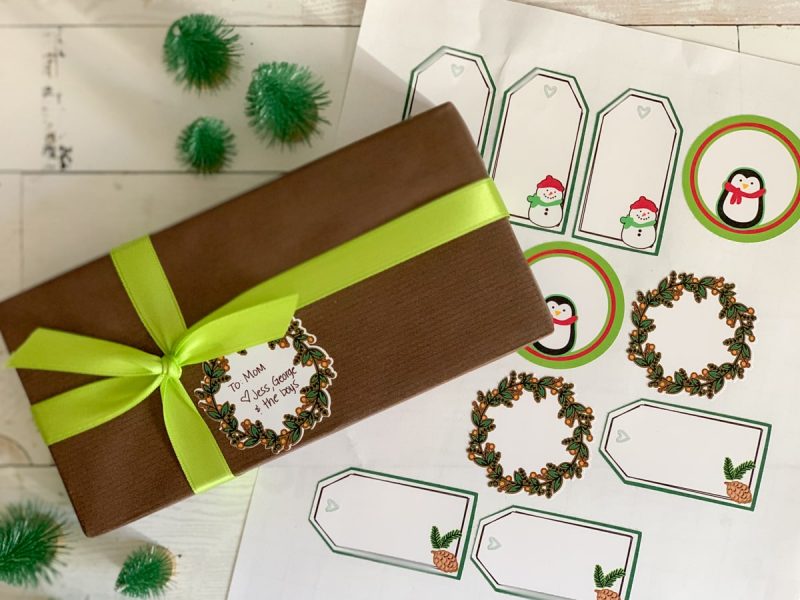
Get out your Cricut and make DIY holiday gift tag stickers in minutes. Today my friend, Jessica Roe, is sharing this fun DIY Cricut project. This is such a useful project this season. You can customize the tags with names or handwrite each one.
Create festive holiday gift tags with your Cricut and designs from JGoode – project design by Jessica Roe
Hi everyone! It’s Jess from Everyday Party Magazine, and I’m so excited to be here today! I’m a Cricut enthusiast, and I love using Jen’s cut designs for party decor, favors, and more!
DIY HOLIDAY GIFT TAGS
The holidays have arrived, and like nearly every year, I am not able to find gift tags when I need them. But, with my Cricut and Jen’s designs, I can quickly make my own gift tags, and not have to make late night runs to the drug store for tags!
TO MAKE THESE FESTIVE GIFT TAGS, YOU WILL NEED:
- Cricut cutting machine
- Cricut Design Space account
- Cut designs by Jen Goode
- Cute Tag (#M1331861)
- Wreath (#M39BC869)
- Pine Cone (#M39BCAAD)
- Christmas Penguin (#M6AFA60B)
- Christmas Snowman (#M6AFA61A)
- Christmas Circle Tag (#M6AFA6CA)
- Cricut Design Space Access
- Cricut Printable Vinyl
- Printer
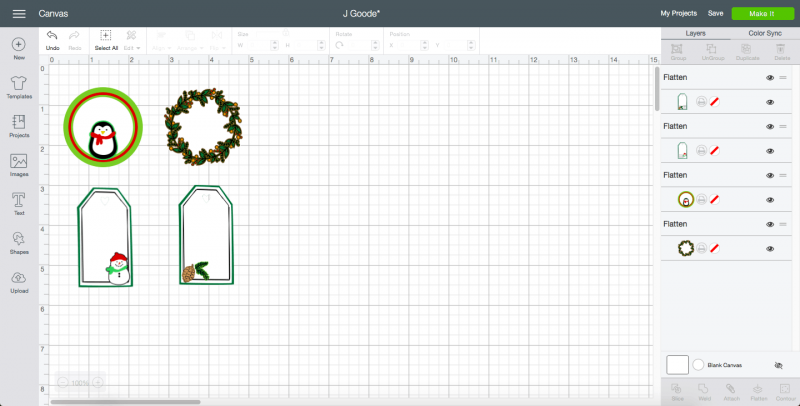
We've set up a Cricut Design Space canvas to help you get started with this holiday must have. Click here to open up the project in Cricut Design Space.
Holiday and Tag art by Jen Goode in Cricut Design Space
Instructions
- Open Cricut Design Space and create a new project. Add the holiday designs using Jen Goode’s cut files.
- Resize the project designs to cut at approximately 2” each.
- Hide any unnecessary layers, and flatten the designs to make them print, then cut files.
- Print the gift tags, I was able to get three of each design on one sheet of printable vinyl.
- Cut the vinyl.
- Fill in the gift tags, and place on holiday gifts!
This is such a lifesaving project this time of year. Have fun creating with your Cricut!


