Organizing pens and pens and other writing/draw tools is important, especially if you need to use them (or find them) regularly. I have a ton of pens and pencils around my desk at any given moment. Some I draw with and some are just for writing. Some I have multiples of the same thing because I love them so and some I have no idea where they came from. I usually keep them in a variety of containers from jars to pretty pencil holders to random boxes that happen to be nearby.
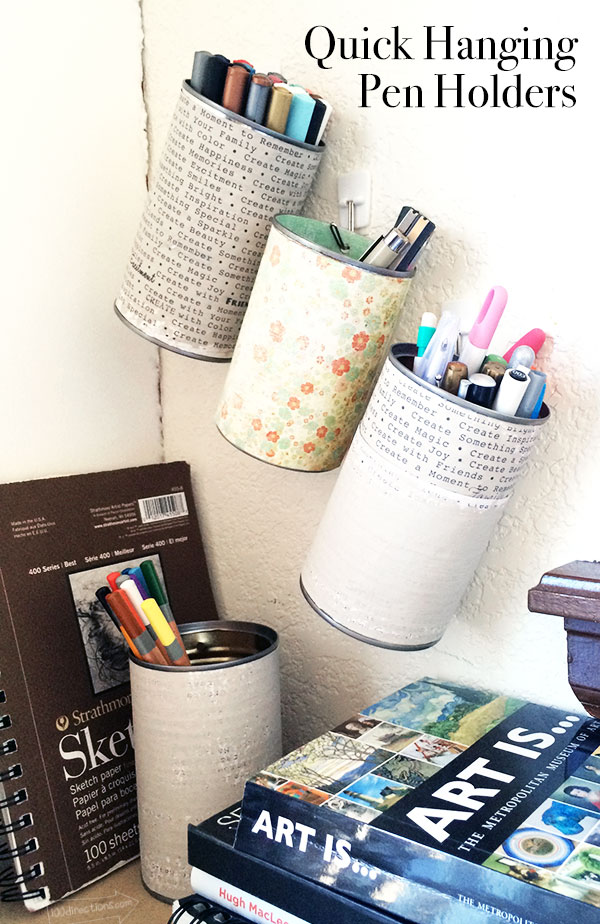
Getting this pen mess organized is pretty important – but there's only so much counter space. So, I'm using the walls! Today I'm sharing how I created quick and easy hanging pencil and pen holders.
It's not entirely a craft, but it's my Craft Lightning project for the day!
Quick Hanging Pencil Holders
This saves so much counter space. Instead of covering your desk or work table with containers to store all drawing or writing tools, hang them on the wall nearby. You'll clear off your work surface and add a little bit of functional decor to your work area walls.
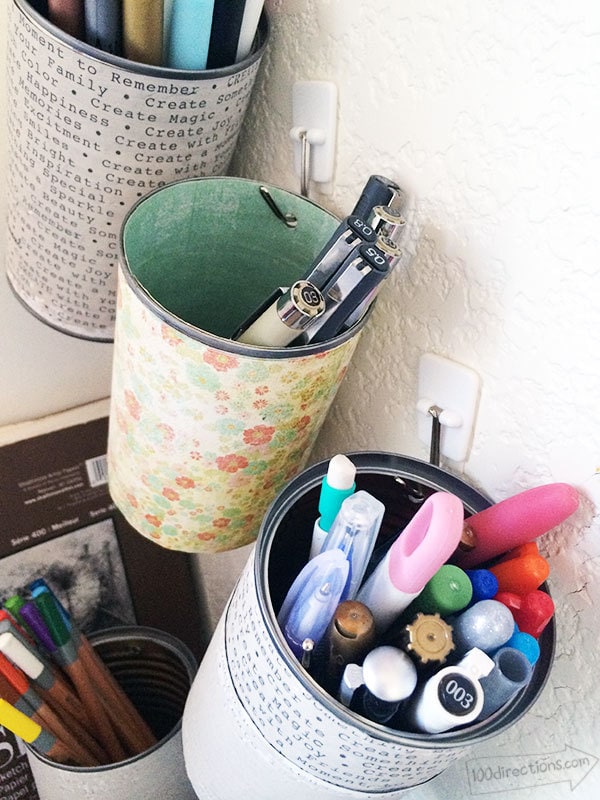
You don't need a lot of supplies…
- Recycled cans – empty, clean and labels removed
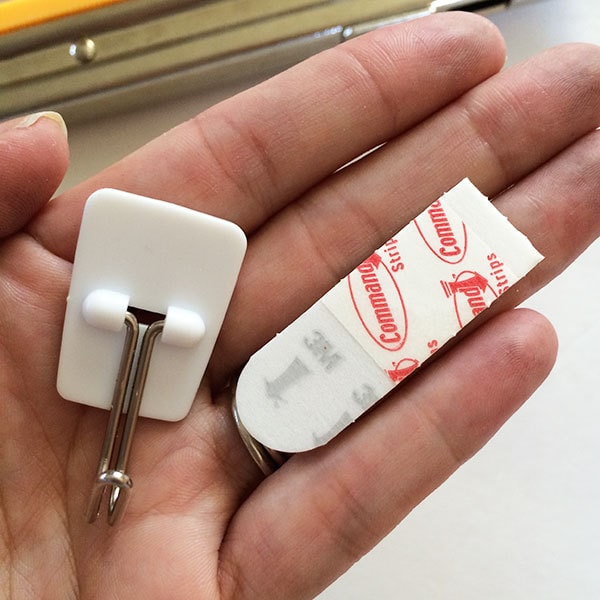
- 3M Command Strips with little metal hanger
- Decorative paper or paint to decorate your cans (optional) – along with glue and scissors as needed
Making your hanging pencil holders
- Decorate your can however you'd like. For today's conversation I just wrapped mine with a paper pattern I created and a scrapbook paper I had in my stash. You can use scrapbook paper or book pages or whatever you prefer. If you truly want to make this project, start to finish, in under 15 minutes, use a paper you have on hand. Trim the paper to size, wrap and glue in place.
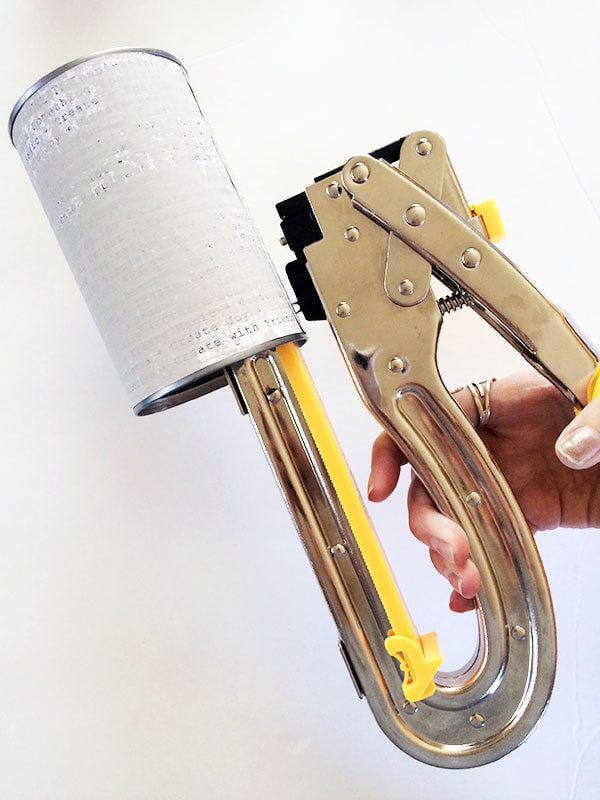
- Add a single hole to the top (about 1/2″ from the top) of your can. I used the big Crop-a-dile to easily punch a hole in my can. You can go the traditional/old school route of using a nail and a hammer to create a hole.
- Take your 3M Command strip and apply it where ever you'd like on your wall – following the manufacturer instructions.
- Place your can on the hook using the hole to hold the can in place.
Tada! Easy Peazy and oh so handy! The time you spend decorating is how long this project will take.
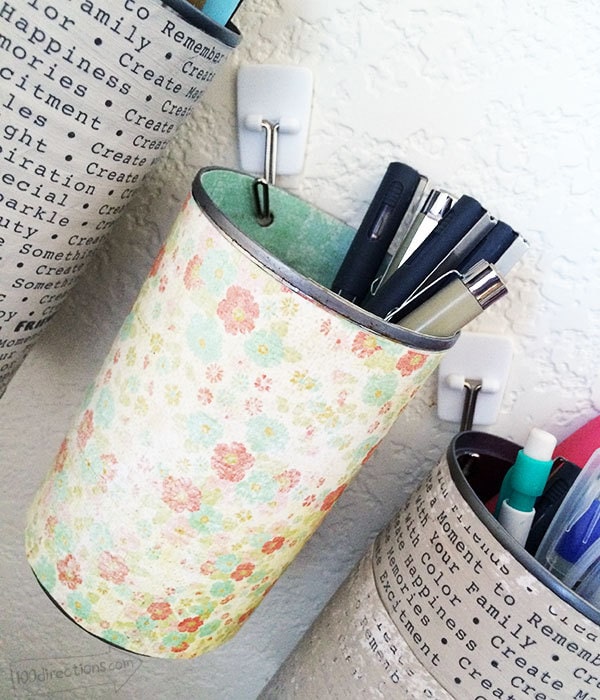
You can really make a million of these – well, probably more realistically a 100 of these cans. Organize all kinds of tools and supplies and keep them off your counter! The best part is, if you really need a can of tool right next to you, you just take it off the hook and when you're finished, you put it away!
I love to look for new ways to organize… at first glance, Im a wreck, but in my head I'm I become such a perfectionist about organizing… someday both sides will meet and there will be a big party! For now, I just collect organizing ideas on Pinterest.
Follow Jen Goode's board CI – organizing on Pinterest.
Head over to Country Chic Cottage for more Craft Lightning ideas today.


Great suggestion, Jen! I’m glad to see more people recycle and reuse their stuff instead of throwing them away! If only they could see how fabulous things, just like yours, they can come to, I bet they wouldn’t do it. I’ll definitely share it with my friends and colleagues as well!
So glad you like it! I’d love to hear any fun recycle ideas you have too. Thank you so much for stopping by.
Such a cute and simple storage option!
Thank you! So super handy and easy to make.
This is perfect and so you!
Thank YOU! I needed this little corner organized so badly… thank you for the motivation!