Create your own pretty ombre nail art in minutes. This is a fun nail art design you can create to show off everywhere you go! You know I love me some pretty nail art. Nail art is one of my favorite quick creative ideas because you can really wear the sparkle all year long and the ombre design is great way to fancy look really quickly. Paint your nails to coordinate with your favorite outfit or show off personal style with this easy to create design. You can use your own favorite colors or grab some from Julep for this design.
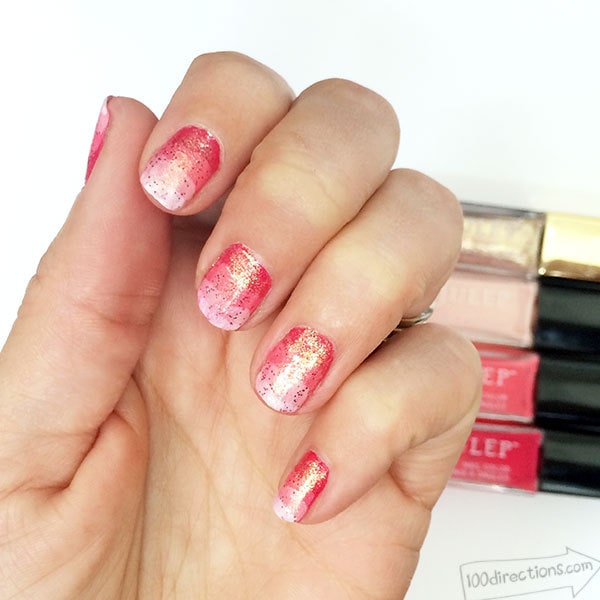
Easy Ombre Nail Art
The trick to quick nail art is the paint layers. You don't have to create super crisp paint lines if you are just going to cover the line with another layer of paint. I like to add a layer of glitter on top which blends the colors and completes the look. In this design I've used 4 nail colors and a glitter top layer. You can create a similar look with only 3 colors if you'd like.
Materials:
- Nail polish in 3-4 colors
- Julep nail colors: Vicki, Jules, Love and Drew
- Top glitter polish
- Your nails 😀
I use a variety of polishes. In this tutorial I am using all Julep colors. Some of the colors I've used are not currently available, but there are plenty of others that are just as beautiful. Instead of “Love” try Nell, a soft sparkle glitter or Hartleigh, it has little heart confetti in it!
Instructions:
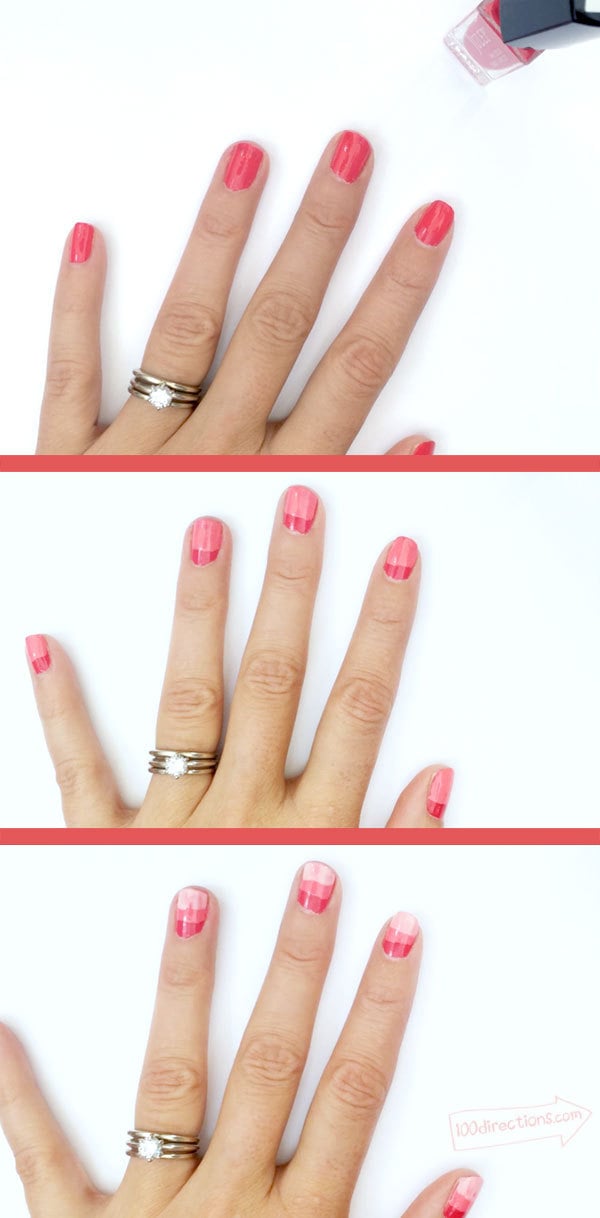
Start with the dark color and add lighter colors as you go. You can create a reverse look by starting light and going dark.
Tip: if you start with the darkest color, make sure you are using polish colors that are not too translucent and will cover. A little peak through between colors is ok.
Allow each coat of paint to dry before adding another layer.
- Cover the entire layer nail with the darkest color.
- Apply the second darkest color, leaving a bit of dark color showing from the bottom of the nail.
- Apply the 3rd color, again, allowing some previous colors to show.
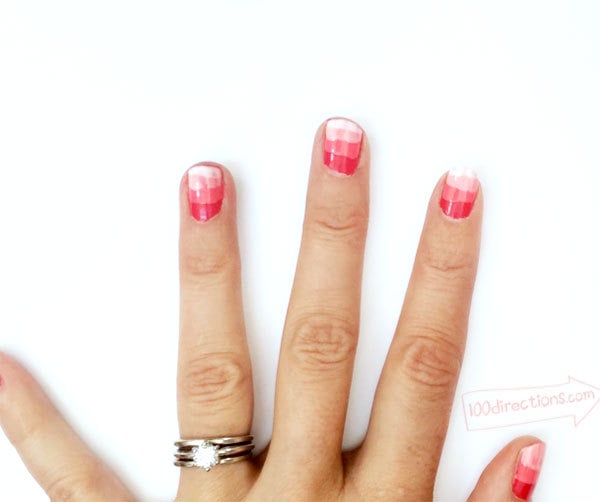
- Add the lightest color to the top of the nail.
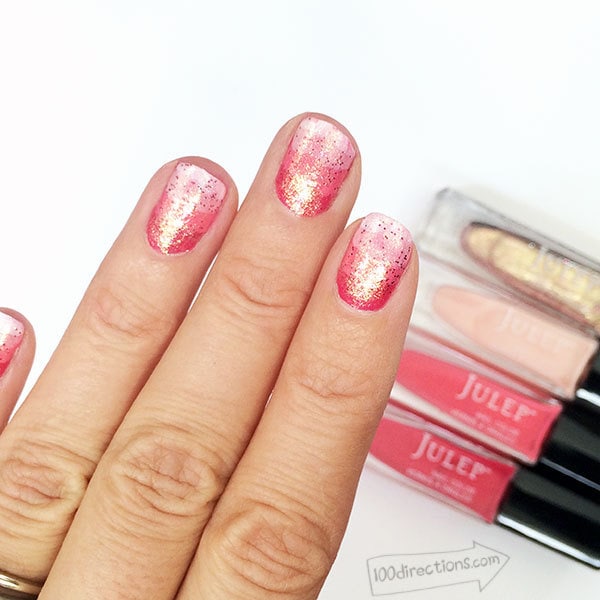
- Cover the entire nail with glitter polish.
- Finish with a top coat to seal the colors and add shine. I LOVE: Out the Door.
Quick video to show you how I created this Nail Art:
Step by Step photos to show you how it's done.
I'm pretty sure reading this tutorial takes longer than actually painting your nails. I love this technique, I hope you do too!
All this week I'll be sharing more quick and easy craft ideas for Valentine's Day. I've teamed up with Angie from The Country Chic Cottage and Carolina from 30 Minute Crafts to feature some great ideas designed by other bloggers. I hope you love them all! Check out the Quick Valentine's Day ideas I shared yesterday.
More Quick Valentines Ideas
So many fun ideas you can make in under 15 minutes. Try one or try them all, which is your favorite?
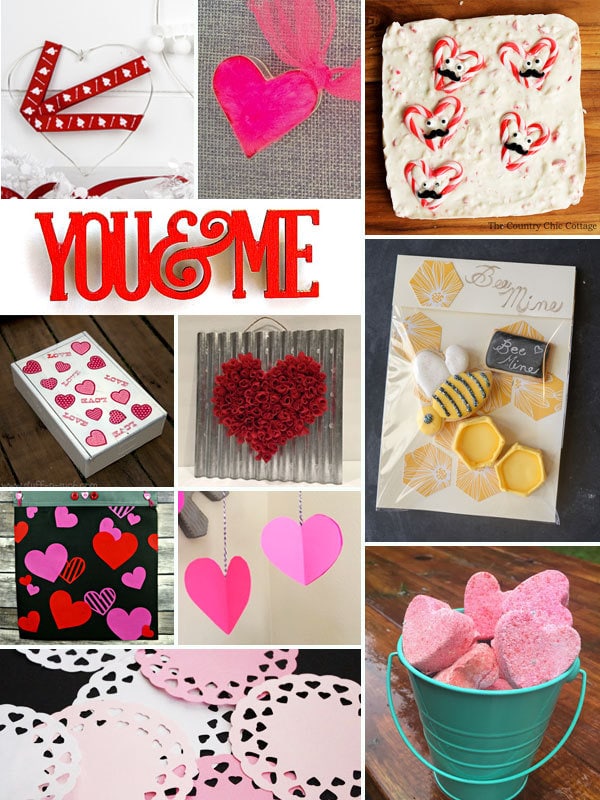
- DIY Wire Hearts from Hawthorne and Main
- Heart Cookie Cutter Ornament from Pet Scribbles
- Valentine's Day Chocolate Bark Recipe from The Country Chic Cottage
- Valentine's Day Word Magnets from Occasionally Crafty
- Love Letter Keepsake Box from Stuff-n-Such
- Easy Rose Heart Sign from FrugElegance
- Cute Be Mine Treat Packaging from Tikkido
- Valentine Heart Flag from 365 Days of Crafts
- 3D Paper Heart Craft from DIY Inspired
- DIY Valentines Doilies from 30 Minute Crafts
- DIY Bath Fizzies from Sowdering About
Follow along all week with this Valentine's Day Craft Lightning Event!
Check back every day this week for more Quick Valentine's Crafts. There are so many fun ideas, I can't decide which to try first! And as always, please stop back by and tell me about the creative ideas YOU make! You can stop by the 100 Directions Facebook page or tag me #jengoodeart to share your own fun creations.


So great! Thanks for co-hosting!